Sausage Hash Browns

dsc04921

350g medium-sized potatoes

Pork sausages (as many as you like, I’m going to have three)

A large knob of butter

1 small onion

2 small red onions or one big one

200g small vine-ripened tomatoes

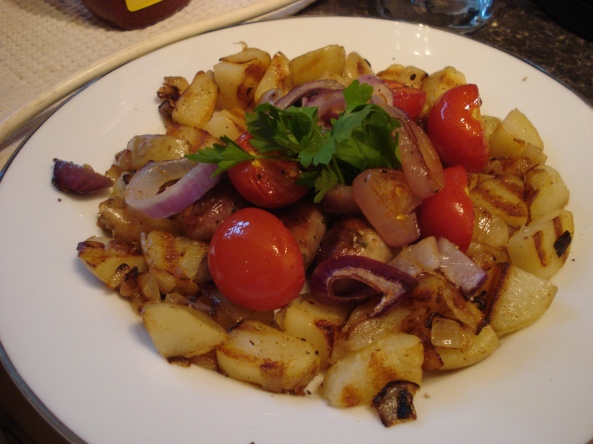
Since Tuesy is away on a series of globetrotting work trips (follow her progress in the Flickr photos you’ll find in the right-hand column on the main page of this blog), I have to do all the cooking for myself. And with nobody to cook for and impress, I might just slack off and eat a lot of processed food. But I’ll try to keep up with the home cuisine and learn a few new things, sometimes involving meat, which I don’t cook for Tuesy. I’m starting with something easy – hash browns with sausage. Seems simple, but in my recipe book, there are no pictures, so I’m not sure exactly what it’s supposed to look like. It won’t look like the delicious monolith-shaped frozen potato cakes that normally get sold as “hash browns”, unfortunately. So, let’s get started. I’ll write as I go. I’ve begun by putting about 700g of medium-sized potatoes into a pan of cold salted water and started them heating up. I’ll parboil them for about 10 mins, then drain them and chop them into 2cm cubes. I’m using King Edwards. There’s no need to peel them.
dsc04917

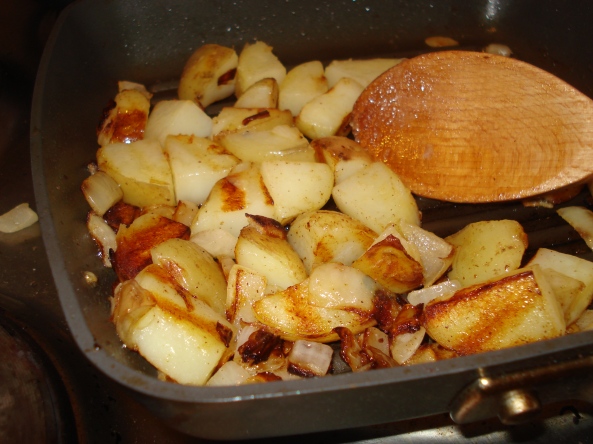
Melt the butter in a heavy-based frying pan, and add the onion, chopped into little bits. Fry for a couple of minutes, then add the potatoes and fry it all up together for about 25 minutes, or until it’s nicely browned. Meanwhile, start grilling the sausages until they’re cooked all the way through.

Chop the red onions into rings, brush them with sunflower oil and add them to the grill pan with the sausages. You can also halve the tomatoes and throw them in, too. One that’s all cooked You can serve the contents of the grill pan on top of the has brown potatoes. Very easy, and a reminder that the best kind of junk food is the stuff you make yourself.
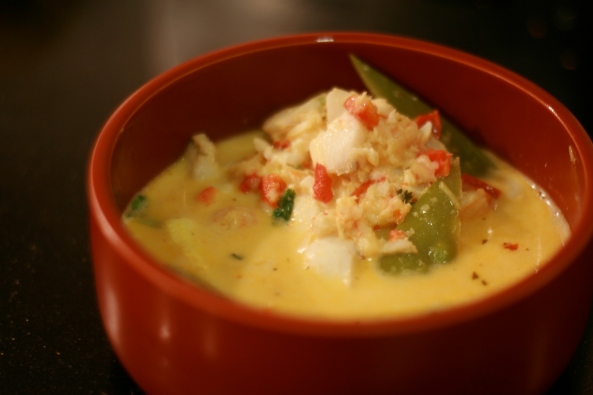
Thai red fish curry

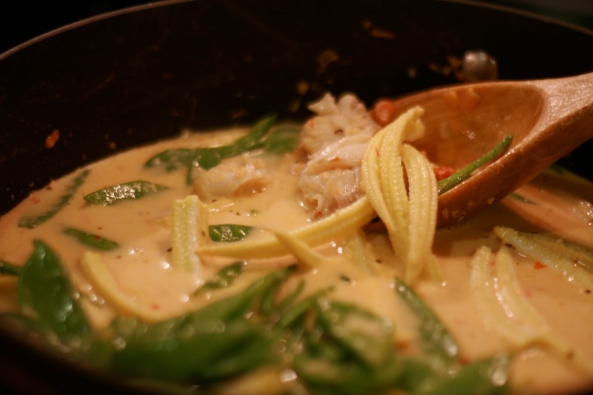
img_3633

This is one of my favourite dishes to make, and it’s really easy, especially if you get a good Red curry paste. Marks and Spencer’s is a tasty one, but I’m sure you’ll find your preference. Prepare yourself with the following ingredients:

  • 4 fish fillets, about 600g in all: This recipe was originally given to me with chicken, but Tuesy doesn’t eat animals with legs, so I tried it with fish and it seems much better. I use haddock, but you can vary it however you like. Meaty white fish works best, though.
  • 1 tsp oil
  • 3 tbsp Thai red curry paste
  • 400 ml can coconut milk
  • 300 ml vegetable stock. You can also use fish stock as long as it’s not too … you know … fishy.
  • juice of 1 lime
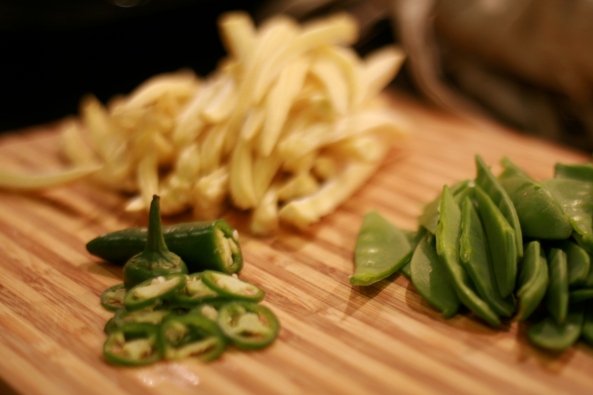
  • 200 g pack mixed baby corn and mangetout
  • 2 tbsp coriander
  • If you want to spice up the curry a bit (or a lot), just thinly slice some fresh green chillies (you won’t need more than one medium-sized chilli for this much curry) and add it to the stir fry.

img_3627

What to do:

  1. Cut the fish fillets into chunks. Big cubes of around 2cm is good. Heat the oil in a wok or a large saute pan. Throw in the red curry paste and cook it, stirring all the time, for about 2 minutes.
  2. Add that fish and then stir-fry it in the paste on a medium-high heat until it’s browned all over.
  3. Add the coconut milk, stock, lime juice and baby corn. Bring to the boil, then add the mangetout. Reduce the heat and simmer for 4-5 minutes until the fish is properly cooked. Don’t overdo the cooking – I like to keep those vegetables good and crunchy.
  4. Sprinkle the chopped coriander (the fresher the better) over the top of the curry and serve it with steamed rice. Believe it or not, that’s all there is to it.

img_3630

Smoked fish pie

dsc044401

This is an easy one, and pies look quite impressive, especially if you pretend you made your own puff pastry. Quick! Grab yourself the following ingredients:

450g smoked haddock fillet, skinned
200ml carton creme fraiche
15g plain flour
20g flat-leafed parsley, chopped
salt and pepper
375g pack ready-rolled puff pastry

  1. Preheat a large shallow baking tray in the oven set at 230C (210C fan oven). Try and pull out any stray bones from your haddock. Got them all out? Nothing spoils a fish pie like the fear of deadly little bones lurking inside it. When your fish has been cleared of these nasty little spears, cut it into little chunks.
  2. Save one teaspoon of creme fraiche for later, and put the rest into a bowl with the fish, flour and parsley. Mix it all together and season with salt and black pepper. Lots of black pepper works well for me.
  3. Now you’ll need a second baking tray. Roll out the pastry onto it, and brush the edges with water to moisten it. It’s like licking your envelope ready to seal it shut. But please don’t lick the pastry, especially not if any of your dinner guests are watched. Dollop the fish into the pastry and spread it over one half of the sheet. Leave a border along those wet edges. Fold the pastry to seal your fishy envelope, pressing the edges together. If you’re feeling fancy, you can crimp the edges. I’m just happy if I can get the pie to stay shut.
  4. Mix that last bit of creme fraiche with a little water and brush it over te top of the pie to glaze it, then slash the pastry with some diagonal lines, Freddy Kreuger-style, so that the steam doesn’t get trapped and explosive during cooking.
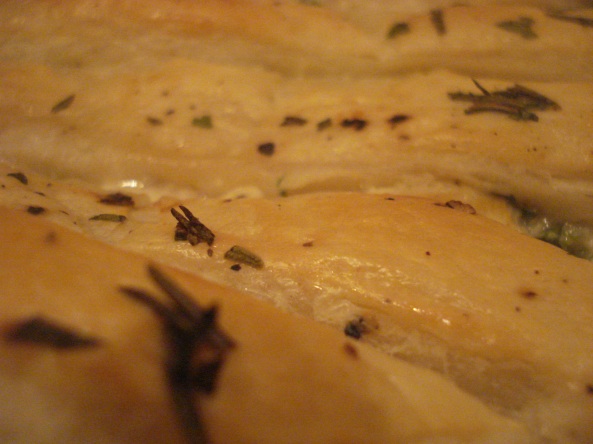
  5. I often have trouble getting the pie to bake evenly – the base sometimes burns before the top of the pastry has cooked enough to rise. The trick is to put your second baking tray, the one with the pie on it, on top of the hot one in the oven, and cook it for about half an hour (you’ll know when it’s sufficiently golden brown).

I promise you will want to eat all the pies if they’re as good as this one. You can use different fish if you prefer – the effect will be much the same, and you can serve it with your own choice of steamed or roasted vegetables, or have it with a salad. Better still might be to scoff it out of a paper bag while sitting on a cold, wet, windy sea-front, but that’s just me.

Salmon Fish-Cakes

Last weekend’s cheer-up-Tuesy charm offensive delivered its grand finale on Sunday evening. Stop me if I sound too boastful, but I was very happy with how this turned out – for an amateur cook, it’s always exciting when a recipe really works, and there are few cooks more amateur than me…

Prepare your fish-cake mixture 2-3 hours before you plan to cook them (they take a little under half an hour to bake). To make enough fish-cakes for four people you will need:
900g maris piper potatoes
900f salmon fillets
Juice of 1 lemon
4tbsp mayonnaise
pinch of cayenne pepper
large pinch of chilli powder (more if you like spiciness)
2 tbsp of chopped herbs (I used flat flat-leaf parsley, but tarragon or basil will work just as well
2 tbsp chilli oil.
Peel the potatoes, chop them into quarters and boil them. Once boiled to softness, drain away the water, and return to heat for a couple of minutes to dry them out. Then mash ’em. With a masher.
While the spuds are boiling, put your salmon and half the lemon juice into a pan with a pint of cold water. Bring it just to the boil and leave to stand in the water for a few minutes. It’ll cook just enough in the remaining heat. Then drain the salmon, peel off the skin and flake it. It’s good not to mash it up too much – the fish-cakes are delicious if you can still feel the “meatiness” of the fish (you don’t want them to be too smooth).

Mix the salmon with the mashed potatoes and add the spices and herbs, the lemon juice and the mayonnaise. Mix well and season with salt and pepper.
Now make your fish-cakes on a non-stick baking tray. I lined my tray with non-stick baking paper, which worked a treat. If you’re good with your hands, you can pat the mixture into eight thick cakes (maybe 2cm deep). If you have a large round biscuit/cookie cutter, you can use that to get them into a nice shape. I used a non-stick heart-shaped fried egg shaper, meaning that my cakes looked like this:
Not too shabby. Put your tray of fish-cakes in the fridge for a couple of hours. This will firm them up ready to be baked. Once they’re ready, drizzle the chilli oil on top and bake at 200 degrees centigrade or until they go brown and a bit crispy on the outside. I served these with mangetout and baby corn and a little rocket. You can serve them with whatever you like. Nobody’s checking.

Spiced Tuna Steak


This weekend, since Tuesy needed cheering up I thought I’d be extra-organised and prepare a couple of seafood dishes. Since she doesn’t eat meat but will happily indulge in piscicide, tuna is an excellent middle ground between veggie and carnivore. I’ll save the other recipe, which I think was even better, for another day. I need to pace myself…

Get yourself some big, thick tuna steaks. As much as you can eat/afford. You’re going to marinade them. To make the marinade, mix the following:
2 tbsp tomato puree
1 tbsp oil
1 tbsp lemon juice
1 tsp grated fresh root ginger. You might want a bit more if you’re a ginger fan.
1 peeled, crushed garlic clove
1 tsp ground cumin
2 tsp ground coriander
1 tsp chilli powder. Again, if you like at spicy, double this. It’s quite safe.
Salt and pepper as desired.

Mix this lot up, and smear it all over your tuna steaks, which you’ve already patted dry with kitchen roll, right? Leave this to marinate for a couple of hours.
(A quick aside. I’m listening to the US Open tennis semi-final. Andy Murray might be about to beat Nadal. Please, please, please…)
OK, here’s the master-stroke. You’re going to make some raita. This is easy, and it’s delicious. You need about 150g greek yoghurt (standard-sized tub), which you mix with some chopped mint and about 50g of chopped cucumber. Chop it fine. Mix this up and it will be a great taste to dollop on your spicy tuna and offset its kick.

Grab your favourite frying pan or griddle. Heat a little oil. Heat it a lot. Cook the tuna steaks for a couple of minutes and then turn and cook for a little more. I like mine scorched on the outside and still pink in the middle. Tuesy likes hers well done. The choice is yours, but the marinade will blacken it a little if you fry it for a long time. That’s still delicious, though.
Serve your tuna with the raita and a green salad. I made it this time with boiled potatoes and broccoli because we were really hungry, but the salad really prioritises the fleshy goodness of your steak. If you cooked it, bask in the appreciation. If it was served to you, feel lucky.
(Murray might be throwing the match away in the time it took me to write this. Dammit. But there’s still a chance…)

Pasta Pesto

I’m really pressed for time. I’ve so much work to do I barely have time to whine about it. But I’m still managing to blog. Some things are still important, and it’s a good way to focus the mind and arrange the swirling thoughts into some kind of comprehensible pattern. And I’ve been pressed into blogging on this by the water-cress pesto that Tuesy has sent me. I urge her to post the recipe so that you, dear reader, can make pesto for yourself. She’s done the real work (and presumably she got chance to use her new food processor): I just want to show you the lovely dinner I made with the pesto.
All it took was a few slices of halloumi, that king of cheeses (shallow-fry it in a little olive oil, or grill it), rocket and cherry tomatoes. Oh, and pasta, of course. I’ve used tagliatelli, but only because the fuselli in my cupboard looks a bit old. If I had any penne in stock, I’d have used that.
Dead easy, and generous in its delivery of deliciousness. So, dear reader (and I hope the use of the singular form of “reader” is not too close to the truth), pester Tuesy with your requests for the pesto recipe, so that you too can pep up your pasty pasta.

Bean Fajitas

This is a delicious dish whether you’re a vegetarian or not. Obviously, you can put chicken or beef into fajitas if you prefer, but since the best bits are the spicy tomato, guacamole and sour cream, you may as well save that meaty goodness for something where you can really taste it. But I have to be honest, although this stuff is delicious, it really doesn’t photograph well, which is why I don’t have a mouth-watering image of the finished product to tempt you with. the above picture is not a full body shot, just a detail, but it gives you an idea. Just go with it and remember that even ugly messy food needs love sometimes.
Heat 2 tbsp sunflower oil in a big pan. Fry a sliced, medium sized onion for 5 mins. While that’s going on you can chop two garlic cloves, or crush them. You will need:
Half tsp hot chilli powder (I also like to throw in some freshly chopped chillis to make it extra spicy. It’s your call, though. This time, I also chucked in some red peppers that needed eating)
1tsp ground coriander
1 tsp ground cumin
Add these to the onion with the garlic and fry for a couple more minutes. Then add:
1 tbsp tomato puree
400g can chopped tomatoes
Quarter pint of hot vegetable stock
Lots of beans. These should ideally consist of 220g tin of red kidney beans, 300g tin of borlotti beans, 300g tin flageolet beans. All these should be drained and rinsed. Actually, it’s just as good if you use red kidney beans and make up the rest with chickpeas. Still delicious.
Season all this with salt and pepper, bring to the boil and simmer for about 15 minutes. In the meantime, you can either:
b) Open a tub of shop-bought guacamole and spend the next 15 minutes getting in some quality time with your brand new Nintendo Wii.
You should also warm up a bunch of flour tortillas in the oven or microwave. Then, when the beans and sauce are ready, spread some down the middle of each tortilla, then dollop on some sour cream and guacamole according to your taste. Fold at one side and then fold in two other sides to form a fajita-shaped parcel. If yours are anything like mine, your fajita filling will dribble out all over the place and mess up your shirt, so take care. Grated cheddar cheese will also make your fajitas extra tasty if you can stand any more deliciousness. Serve with cold lager, preferably in a bottle with a slice of lime jammed down its neck.

Live Salad!

Today, I bought a living salad from the supermarket. I tried this once before, and it flopped worse than a Nicole Kidman movie. Dead within a day or two. But I thought I’d give it one more try. Well, it’s still standing up straight almost twelve hours after arriving in my kitchen. But I’ll keep an eye on it and report on its tenuous attempts at clining onto life. Check back to this blog to witness the ongoing, poignant struggle of a bunch of little plants fighting for their lives against the twin demons of inadequate sustenance and me putting them in a cheese and pickle bap from time to time. I’m not very good at keeping plants alive, but maybe the promise of cheap food will be a good incentive to try harder.

For those of us who live in garden-less flats with barely a window to show for it (I don’t need your pity, really), salad still in its soil is a little piece of farming experience brought into your very home. OK, that’s a bit much – it just seems more authentic and natural than those machined, air-tight salad bags they sell in their millions every day, which wilt and sag the minute the polythene bubble is burst. I hope it lasts. Watch this space…

Butternut Squash and Spinach Lasagne

This is in the oven right now as I start writing this. It’s my first attempt at lasagne. Ever. And the greengrocer seems to have sold me some slightly dodgy spinach, so I can’t really vouch for its quality just yet. Maybe Tuesy can report back after I serve it up.

Here’s what you need to do:

1 Butternut squash
2 tbsp olive oil
1 medium onion, peeled and sliced
salt and pepper

Peel and halve the squash. De-seed that thing. Chop it into big chunks (1 inch square has to be good enough, I reckon), toss it all in a roasting tin with the olive oil, chopped onion and a tablespoon of water. Season with salt n’ pepper. Roast at about 200 degrees (or considerably less if your oven is a fan-assisted raging furnace like Tuesy’s) for 25 mins. While that’s going on, you can get started on the sauce:

25g butter
25g plain flour
1 pint milk

Melt the butter in a pan, stir in the flour and cook for a couple of minutes. Gradually add the milk, stirring all the time (you don’t want it to go too lumpy) and then simmer it for about five minutes. It’ll go a bit thick, but not too stodgy.

In the meantime, cook 250g of baby leaf spinach in a few dribbles of water (use a separate pan!). Add salt and pepper.

To finish the sauce, you’ll need:

250g carton of ricotta
1 tsp freshly grated nutmeg (Tuesy: I did the grating!!)
6 sheets of that
lasagne that doesn’t need pre-cooking (Tuesy: this means, use regular lasagne sheets but you don’t have to pre-cook even if the packet says so. As this is very saucy, the pasta will cook anyway!)
50g of parmesan cheese, grated (we like it cheesy, so we’d go up to 80g for this one. I know, we’re just wild…)

Mix the ricotta into the sauce, add the nutmeg and a bit of salt n’ pepper if you haven’t got enough seasoning already. Here, for atmosphere, is a picture of some nutmeg during the grating process:

Now you get to build your lasagne. In an ovenproof dish, put the squash and onion stuff, nicely roasted by now, in the bottom, add the spinach on top and in between and all over, then about a third of the sauce. Layer the lasagne sheets on top, pour on the rest of the sauce. Finally, sprinkle the cheese on top and still more salt n’ pepper if that’s your thing.

Bake for about half an hour, or until the top part achieves your ideal level of crispy, golden goodness. Mine is nearly ready. Hope it’s good. Tuesy’s getting ready to test out her new food processor with some cup cakes, so there may be a delicious dessert blog to come shortly.

Tuesy: The lasagne Dan made is the best lasagne I have ever had in my flat tee hee… it was the FIRST lasagne I’ve ever had in my flat 🙂 But but but! It was also the best lasagne in the whole world! I absolutely love it!

The picture below is a macro shot of the lasagne. We love a crispy top!

PS. Dan used the Good Housekeeping guide to cookery for this recipe. He got it from his brother for xmas and it has changed his life! And I am grateful, of course 🙂

PPS. Recipe for the delicious dark chocolate cup cake to be published soon!

Duck!

In the absence of full introductions, I should probably explain who we are. We are united by a passion for food. Maybe “passion” is a bit strong. We’re not experts, but we like to have a go in the kitchen. Tuesy is a bit more vegetarian than I am, but I have been eating a lot less meat since we met. We both eat seafood whenever we get the chance. There won’t be too many fancy recipes and, particularly in my case, a lot of this stuff is a bit “experimental”.
For instance, tonight I had duck for dinner. I had a couple of breast in the fridge, and no recipe book to hand. Time to improvise. I mixed some soy sauce, runny honey and wholegrain mustard (optional) in a bowl and dunked the duck into it. You can also roll the duck around in a bit of flour first if you like. I have no idea what this does (told you I wasn’t an expert), but it might help the marinade to stick to the meat. Maybe.
Throw the duck into a frying pan and cook on both sides for as long as you like. I like mine to be a bit pink in the middle, and crispy on the outside. Some may be scared by too much poultry pinkness, though. If you prick the skin before you fry, it’ll cook in its own juices. Because I can’t be bothered washing up extra pans, I took the liberty of chucking in some courgettes and red pepper to cook in the same trickles, but you might find that repulsive. Steam some veg to eat with it if you prefer. It’ll get very fatty in that pan. Sometimes I soak it up with some kitchen roll or just tip it away. You don’t want it to get too greasy before you eat.
Hey, I’m a beginner. But this tasted great, took about twenty minutes to prepare, and I’ve got some left over for tomorrow. It looked like this: